Assignment
Assignment date(s) Begin: 04.10.19 (Black Day) and 04.11.19 (Gold Day)
Due Date(s): 04.30.19 (Gold Day) and 05.01.19 (Black Day)
Due Date(s): 04.30.19 (Gold Day) and 05.01.19 (Black Day)
Step 1
Decide whether you will shoot Architecture, Urban Landscape OR Landscape.
Step 2
Choose your subject. If you are going to do architecture, choose where you will go. If you are limited based on getting rides and so forth, remember you can shoot photos of the school as architecture. If you live within walking distance you can come to the school when no one is here and take photos of the front of the school and then get a detail shot of a particular part of the front. There is no excuse for not completing this assignment.
Step 3
Get out and take your photos! Don't limit yourself. If possible, go at different times of the day... or different days. Try different angles, different places, etc.,... Don't let yourself get stuck! Experiment. You will need a contact sheet of at least 6 shots of the big view (they should all be fairly different if you are experimenting correctly) and 6 shots of detail. You should have no LESS than 12 shots for your contact sheet. I would expect that you have a few more if you are experimenting correctly.
Step 4
Make your contact sheet. If you can't remember how, please click the following link. How to make a contact sheet in Bridge. You need at least 20 photos on your contact sheet for 15 points... 20+ for 20 points. More is good. This time make your contact sheet 8.5 x11. Follow the directions on the linked site.
Step 5
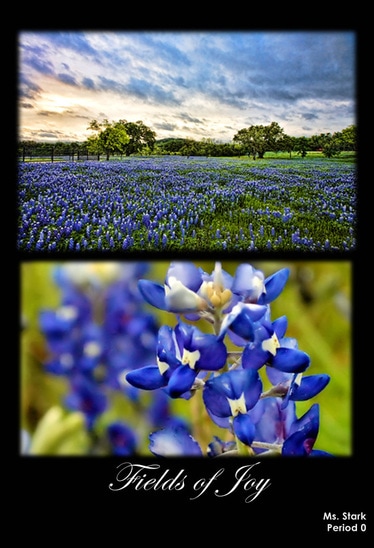
- Create a 19 x 13 or 13 x 19 document (depending on what you want your end product to look like). If your photos are horizontal, make it 13x19 and if they are vertical, 19 x13. Make sure the resolution is at 300!
- Make a BLACK background
- Place your photos (one big view, one detail)
- DO NOT STRETCH THE PHOTOS... remember to hold the shift key when you are enlarging or reducing the size.
- Give your piece a title (be creative)
- Save as both .psd and .jpg.
- Try to take matching photos (for instance, both photos horizontal or both photos vertical).
- Vertical photos will work better with a horizontal lay-out, while horizontal photos will work better with a vertical lay-out.
- Upload your final product as a JPG (file name should read your last name_first initial_arch_pd# ---- use ldscp if you did landscape).
